
It's time for another HawkEye Tech Tutorial! Today I’m going to demonstrate how to install a glue in transducer.
Click Here to Watch the HawkEye® Glue In Transducer Video
This transducer is suitable for vessels with the following hull types: High speed boats to increase the performance of the depth sounder. Trailer boats to prevent accidental damage to the transducer from trailering. Shallow draft boats to prevent accidental damage to the transducer from intentional or unintentional ground. NON-CORED hulls or aluminum hulls thinner than 1/8”. Inboard vessels that have a lot of running gear that creates significant acoustic noise and water turbulence. If you think that this transducer is not suitable for your vessel, contact us by phone, email or at our website and we’ll be happy to review your installation plan and offer suggestions for alternative transducer options.
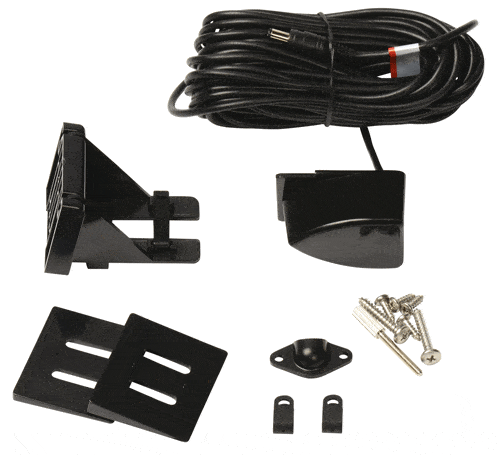
Tools & supplies required for this installation are:
- A Plastic Bag
- Petroleum Jelly
- 30 Grit Sandpaper
- 2 Part, Slow Cure Epoxy
- A pencil
- Zip-Ties
- Clean Up Rags and a Mild Cleaning Solvent
Now, let’s get started.
The most important thing to keep in mind is that transducers can only be glued inside hulls that are SOLID fiberglass or up to 1/8th” aluminum. However, since boat hulls absorb acoustic energy, transmitting through the hull reduces the transducers performance. It’s important to note that fiberglass hulls are often reinforced in places for added strength. These cored areas contain wood or structural foam which are poor sound conductors. To achieve optimal performance, find a location where the hull’s laminate is solid fiberglass and not cored.
Let’s begin by establishing a baseline for the depth finder readings. Anchor/Moor the vessel in a body of water away from other boat traffic. Make sure you turn off all other sonar devices on your boat and locate the vessel at least 50 feet from the nearest vessel.
Now, plug the transducer cable into the back of the depth sounder display and turn the display ON. Once the display is turned ON, it will display the test sequence and then display three-dashes. Place the transducer close to your ear (do not press up against your ear). If the transducer is properly connected it will be emitting a ticking sound (similar to a wrist watch). If you do not hear this ticking sound, recheck your connections or visit our Customer Service Center for advanced troubleshooting. Before proceeding, make sure the Keel Offset feature is turned OFF. If it’s ON, the K/O icon will be illuminated on the depth finder display. You will need to set the keel offset to zero. Now hold the transducer over the side of the vessel so that it is the same distance below the water surface as it would be at the in-hull mounting location. Note the depth that is being displayed on the Depth Sounder. Remove the transducer from the water and proceed to testing the depth readings with the transducer at the desired in-hull location.
Method 1: Place in Plastic Bag
If the hull surface is not smooth, sand it with 30 grit sandpaper until a smooth surface is obtained. Partially fill a thin plastic bag with water, place the transducer inside and close it tightly with a tie wrap. Wet the surface of the hull and press the transducer face against the hull through the bag and check the depth reading on the display
Method 2: Set in Bilge Water
If the transducer will be located in an area in the hull that holds water, place the transducer against the hull and allow bilge water to cover the surface where the transducer touches the hull. Now check the depth reading on the display.
Method 3: Petroleum Jelly
If the hull surface is not smooth, sand it with 30 grit sandpaper until a smooth surface is obtained. Coat the face of the transducer with petroleum jelly and press it against the hull with a twisting motion. Use duct tape to hold it in place. Now check the depth reading on the display.
Now that you have the transducer temporarily affixed to the hull, it’s time to take the vessel for a test drive. Before heading out, make sure the display is functioning properly and familiarize yourself with the operation of the display.
Remove the vessel from its mooring and operate it at idle speeds while getting to know the functions and performance of the depth sounder. Now, gradually increase the boat speed and observe the depth readings (make sure you stay in water between 2.5 and 200 feet deep). If three-dash readings appear, put the vessel in a slow turn. If the dash readings disappear when turning, the transducer’s position probably needs adjustment because it is in aerated water. If the three-dash readings do not disappear while turning, relocate the transducer using any one of the previous test methods. If following the “bilge water test method”, make sure that your three-dash readings are not caused by the bilge water flowing away from the transducer face while turning, accelerating or decelerating.
If you are happy with the performance of the depth finder, then mark the area with a pencil or marker and proceed to Gluing the Transducer in Place. DO NOT proceed to the next step until you are satisfied with the readings. If you have difficulties please visit our Customer Service Center on our website or call 888- 667-2767 for technical assistance.
If during these tests three-dash readings constantly appear, then the transducer cannot be mounted inside your hull. Follow the instructions for transom mounting the transducer, or contact us and ask about exchanging your transducer for one that is more suitable for your vessel.
If during these tests three-dash readings randomly appear or the readings are noticeably different from the depth displayed when the transducer was hung over the side of the boat, you will need to find another location using the 3 methods described previously.
If the readings are satisfactory mark the spot in the hull and proceed.
To affix the transducer to the hull use only 2-Part, Slow Cure Epoxy. Never use any adhesive or glue that is not 2 part, slow cure epoxy such as silicon sealant, weather sealants, rubbery caulks, construction adhesives, 5 minute or quick cure epoxies, rubber cements or 3M’s 4200 or 5200 adhesive sealants. Start by prepping the mounting location. All surfaces to be bonded must be smooth, clean and dry. If the hull surface is not smooth, sand it with 30 grit sandpaper until a smooth surface is obtained in an area a little larger in diameter than the length of the transducer.
Clean and dry both the selected area and the face of the transducer with a weak solvent to remove any dust, grease or oil. Prepare the adhesive as per the directions supplied with the adhesive ( DO NOT mix the epoxy on the transducer). Apply a generous amount of adhesive to the entire face of the transducer (side opposite from the cable) and the inside of the hull. Press the transducer face onto the hull with a twisting motion to expel all air bubbles. (If the hull is slanted, temporarily secure the transducer in place with duct tape.) Allow the adhesive to cure as per the manufacturer’s instructions.
Finally, route the cable to the display mounting location and connect it to the display.
After the epoxy has dried as per the manufacturers recommendation, take the vessel for a ride. If you are not happy with the readings there are very little adjustments that you can do at this time. You will need to remove the transducer and return to Step 1 of the Glue-In Instructions.
To Remove the Transducer, place a piece of wood against the base of the transducer. Gently “TAP” the piece of wood with a hammer. DO NOT strike the transducer directly. Once the transducer is removed from the hull, sand the excess epoxy adhesive off with sandpaper (minor sandpaper scratches will not harm the transducer). DO NOT use chemicals to remove the excess epoxy